When you set up an Ok Alone account, a set of core features is enabled by default. As your team’s needs evolve, you can turn additional features on or off to streamline the dashboard and app experience. This article explains how to access Feature Management, what each feature category does, and how to enable or disable features safely.
Accessing Extra Features
Log in to the Ok Alone dashboard as an Admin or a user with permission to modify settings.
In the sidebar, click Settings.
Under Settings, select Extra Features.
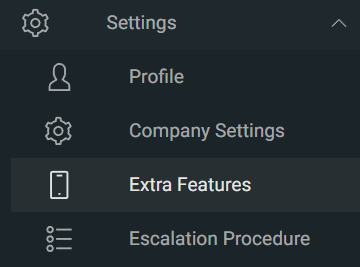
Once you open Extra Features, you’ll see four main sections:
Dashboard Features
App Features
Communication Plan
Integrations
Each section groups related capabilities so you can quickly understand how toggling them will affect your account.
Feature Categories
1. Dashboard Features
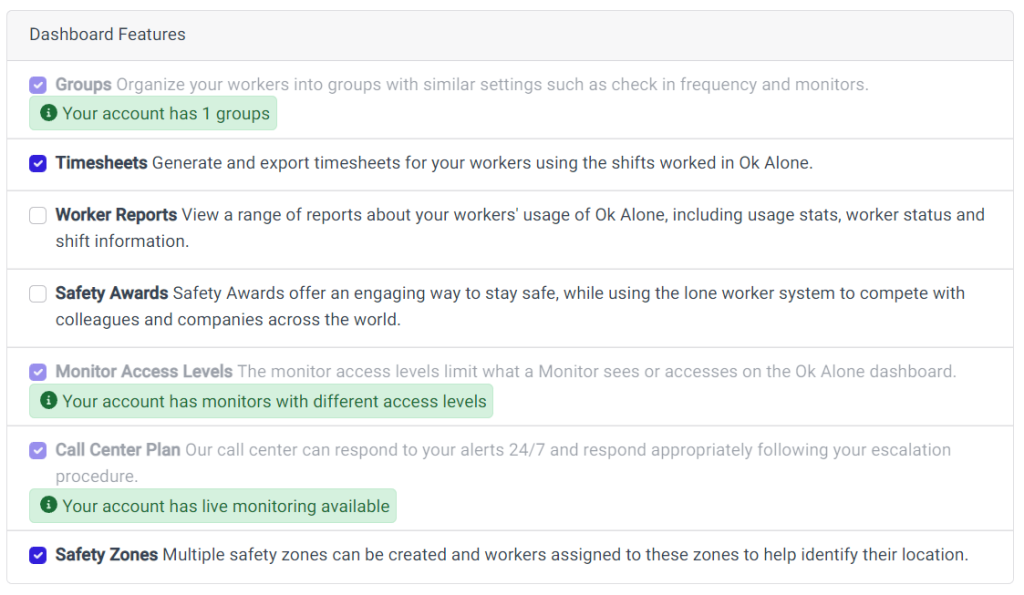
These controls affect what Monitors see and use on the web dashboard. Common options include:
Groups: Organize workers into groups for targeted alert routing.
Worker Reports: Enable detailed reporting on check-ins, shifts, and alerts.
Safety Awards: Turn on gamified recognition (points, certificates) for workers who consistently check in.
If a Dashboard feature is already in use—for example, if you have existing Groups—the corresponding section will be grayed out. You must delete or disable any associated data (such as removing all Groups) before you can toggle that feature off.
2. App Features
These settings determine which capabilities appear in the Ok Alone mobile and desktop apps. Examples include:
Check-In Timers: Let workers choose or remove preset check-in intervals.
High-Risk Check-Ins: Allow workers to switch to a shorter timer when in hazardous situations.
Man Down Detection: Enable or disable fall-detection.
Disabling an App feature removes it from every worker’s app interface. If workers are actively using a particular app feature, the toggle will be grayed out until you remove all dependencies (for instance, delete any active high-risk timers).
3. Communication Plan
The Comms Plan section governs advanced notification workflows, such as:
Start/End Shift Reminders: Automatically remind workers to start or end their shifts.
Out-of-Hours Monitoring: Assign different escalation rules for after-hours alerts.
Alert Loops: Set up sequential notifications (email, SMS, phone call, WhatsApp) so that if one monitor doesn’t respond, the system moves on to the next.
Because these features tie directly into your account’s escalation procedures, any enabled Comms Plan option will be grayed out if monitors or workers are actively relying on it. To disable, first remove or reconfigure the associated reminder/escalation in the Communication Plan settings.
4. Integrations
Integrations let you connect Ok Alone to third-party services, increasing functionality and response accuracy. Common integrations include:
what3words (recommended for pinpointing worker locations)
Microsoft Teams (send alerts directly into Teams channels)
Zapier (automate workflows between Ok Alone and other business apps)
If an integration is already linked—for example, if you have an active what3words account connected—the toggle will be grayed out until you disconnect that integration from your account.
Enabling or Disabling Features
-
In each section, click the checkbox beside a feature to turn it on or off.
Checked = Feature enabled.
Unchecked = Feature disabled.
If a feature’s row is grayed out, that means the feature is currently in use.
- To disable, first remove all active configurations (e.g., delete all Groups before disabling Groups).
- Once no active dependencies remain, the checkbox will become clickable.Repeat for every feature you wish to change.
Tip: If you’re unsure whether a feature is in use, double-check your Dashboard or Communication settings. For example, if “Worker Reports” is grayed out, open the Reports menu and see if any scheduled or historical reports rely on this feature.
Saving Your Changes
After adjusting the checkboxes:
Scroll to the bottom of the Extra Features page.
Click the blue Update Your Feature Settings button.
Only when you click Update Your Feature Settings will the system apply your changes. If you navigate away without saving, your toggles will reset to their previous state.

Best Practices
Plan Before You Toggle
Review which teams or workers rely on each feature. Disabling a feature without migrating or removing its dependencies can interrupt workflows.Notify Your Team
Let Monitors and Admins know when you disable a Dashboard or Communication feature, as it may change their notification patterns.Test in a Staging Environment
If possible, experiment with new features in a test account before enabling them in production.Use Integrations Wisely
Enable only the integrations your team will actively use (e.g., what3words for faster dispatch). Unused integrations can clutter the interface.
Need Help?
If you have questions about Feature Management or run into any issues:
Contact your Ok Alone Admin for guidance on removing dependencies.
Email Ok Alone Support at customer.support@ok-alone.com