OK Alone’s Advanced Country & Time Zone Settings help you manage accounts with Workers and Monitors in different countries or regions. By assigning each user a country and time zone, you ensure that notifications, check-ins, and shift reminders use the correct phone formatting and local times. Follow the steps below to enable and configure these settings.
When to Use Advanced Country & Time Zone Settings
Your team operates in multiple countries or regions with different phone numbering formats.
Monitors and Workers need to see times in their local time zones, rather than a single company time.
You rely on SMS or phone call alerts, and accurate country codes matter.
Overview of Company Country & Time Zone
-
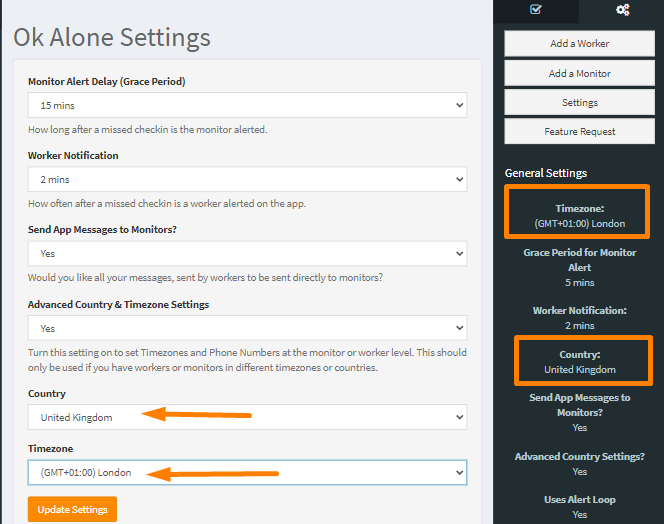
View Current Settings
Click your account avatar in the upper right corner or go to Settings.
In the sidebar, select Company Settings.
Observe Company Country (used as the default phone region) and Company Time Zone (used for scheduling and reports).
-
Important Note
Once your account is active, avoid changing the company country or time zone. If you must, make sure no Workers are on shift or contact support for guidance.
1. Turn On Advanced Country & Time Zone Settings
In the Ok Alone dashboard sidebar, click Settings → Company Settings.
Find Use Advanced Country & Time Zone Settings and set it to Yes.
Click Update to save.

2. Configure User-Level Country Settings
With Advanced Country Settings enabled, you can assign a country to each Worker and Monitor, ensuring correct SMS and phone formatting.
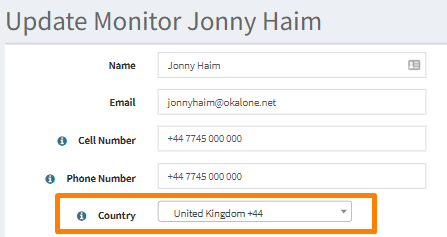
Set a Monitor’s Country
In the sidebar, click Monitors.
Find the Monitor you want to edit and click Edit.
In the Country dropdown, select the Monitor’s home country.
Click Update Monitor.
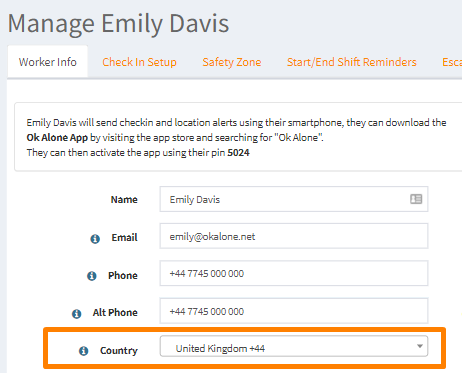
Set a Worker’s Country
In the sidebar, click Workers.
Find the Worker you want to edit and click Edit.
In the Country dropdown, select the Worker’s home country.
Click Update Worker.
3. Configure User-Level Time Zone Settings
Advanced Time Zone Settings let each user see times (shift schedules, reminders, reports) in their local zone.
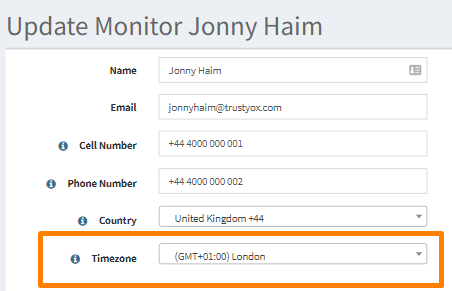
Set a Monitor’s Time Zone
In the sidebar, click Monitors.
Click Edit next to the Monitor’s name.
In the Time Zone dropdown, choose the Monitor’s local time zone.
Click Update Monitor.
Set a Worker’s Time Zone
In the sidebar, click Workers.
Click Edit next to the Worker’s name.
In the Time Zone dropdown, choose the Worker’s local time zone.
Click Update Worker.

Tip: Setting a Worker’s time zone is especially important if they use Start/End Shift reminders or SMS/phone check-ins.
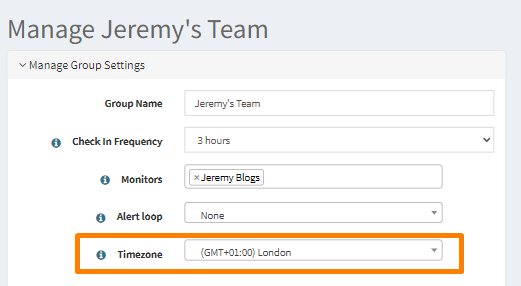
4. Configure Group-Level Time Zone Settings
Assigning a time zone to a Group simplifies configuration for multiple Workers in the same region.
In the sidebar, click Groups.
Find the group you want to edit and click Edit.
In the Time Zone dropdown, select the desired time zone for that group.
Click Update the Group.
When you add a Worker to this group, their time zone will automatically update to match the group’s setting.
Best Practices
Define Company Defaults Carefully
Set your company country and time zone before adding users. Changing afterward can disrupt schedules and reports.Communicate with Your Team
Let Monitors and Workers know when they need to select a country or time zone. Provide guidance on when to use app check-ins versus SMS check-ins.Use Group Time Zones for Large Teams
If you have many Workers in the same region, assign their group a time zone so you don’t need to edit each profile individually.Verify Phone Number Formatting
Once a country is set, make sure each user’s phone number is entered in the correct local format (e.g., +1 604 555 1234 for Canada).
Need Help?
If you have questions about Advanced Country & Time Zone Settings:
Email Ok Alone Support at customer.support@ok-alone.com
By enabling and configuring these settings, you ensure all users see accurate local times and receive SMS or phone alerts in the correct format—no matter where they are located.